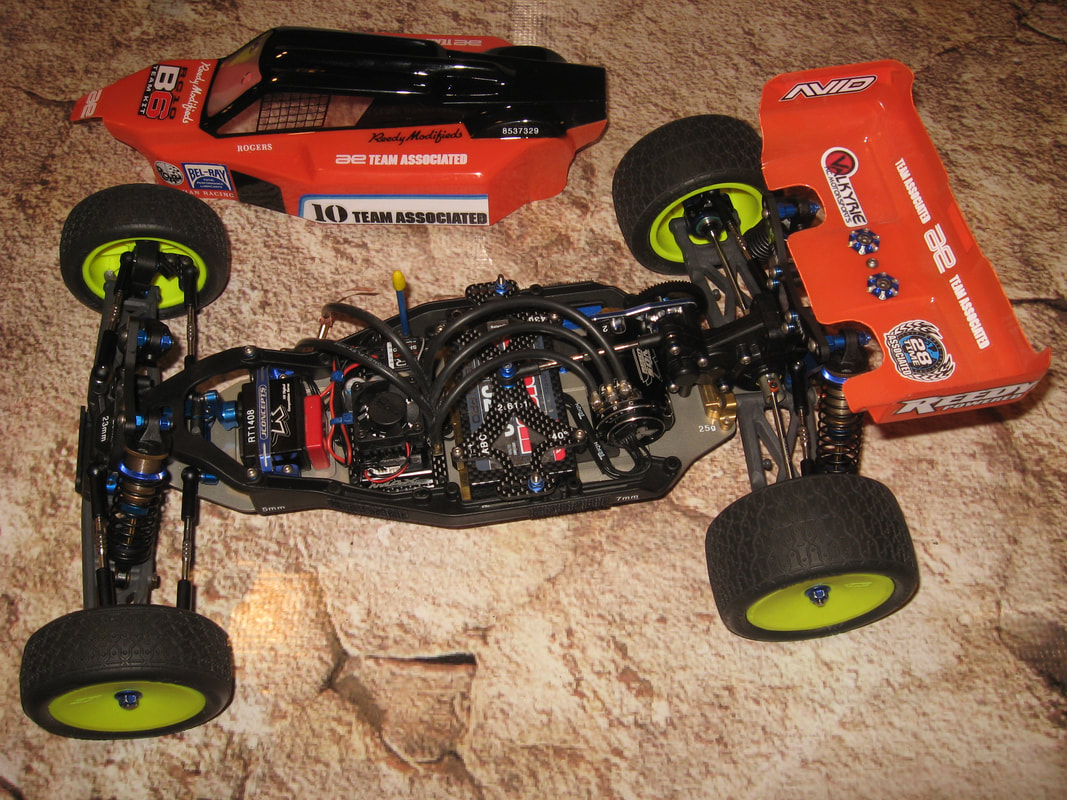
 When racing you will find many opinions on set up, technique, and even what paint color is faster (blue is the fastest). How many of us remember what it was like just starting out? You will find just as many opinions on what to bring to your first race. I started racing RC in 1986, and I hope I have learned a few things during that time, even if not placing in the Worlds recently. Here I will offer some advice on basic "bare bones" upgrades, and a few tips that I feel are needed to minimally compete on today's tracks. CLass & Budget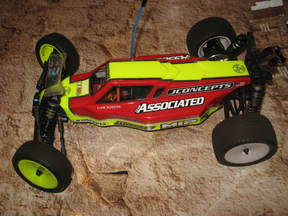 First, you need to decide what you can afford and what you would like to run. My recommendation has always been to buy the best equipment that you can afford at the time. I did not write the most expensive. When getting into the hobby, it is cheaper to buy solid dependable equipment the first time around, instead of having to replace major components later, and spending more. Don't forget about the prior release model, it can still be very competitive, and a lot cheaper to run until your ready to move up. Often used cars can be found considerably cheaper, parts are common, and most manuals are available free online. You do not want to be running a car so old, however, where parts are unobtainable or expensive. Tools Most kit tools are junk. Keep the shock tool and four way wrench that came with the kit, but toss the evil "L" shaped Allen tools. The four way is useful for getting into tight spaces, but I would still recommend picking up a set of quality nut and Allen drivers, with an actual handle. Look for tools with replaceable tips. Occasionally you will snap a tip, it is to be expected. Common pliers, wire cutters, a sharp hobby knife, a soldering iron rated 40 Amps or above (soldering guns are not recommended), and vise grips are all that is really needed to get started, along with the driver sets. Kit BUild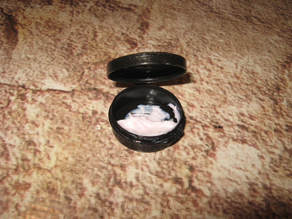 If you have never assembled a kit, ask for assistance. You should be the one to build the kit, as it allows you to learn how it is constructed, and you will be able to make repairs when needed. Most hobby shops will offer to build for a fee, but they will be just as likely to help you out if you have questions when doing it yourself. If seeking advice at a shop, buy something. I don't care if it is a bolt, or chewing gum, it is a way of showing appreciation to the shop for their help. My biggest suggestion on building is go slow and actually READ the instructions twice prior to starting. Do not "crank on it" and call it good, stripped and broken parts are more likely to fail in a race, and will cost you more to fix. Pay attention to the force you are using and that the correct hardware is being utilized for its location. I also recommend using a lubricant on all plastic screw locations for the build. White lithium grease (photo above left) is best, but clear RC differential lube can work if you have nothing else. Only a minimal amount of lube is needed on the screws and you most likely will not need it on the parts in the future. Same with thread locking compound (TLC) on screw to metal parts. Only a little is needed, and make sure you use the temporary rated TLC (normally blue), as the permanent (often red) will present a "problem" during tear down. Titanium rods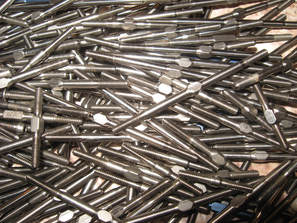 Titanium rods are a must for racing. Often kits include soft steel as a cost saving measure, these simply will not suffice even if you are the worlds best driver. You will bend or break the kit rods resulting in a Did Not Finish (DNF). Titanium is more durable and well worth the expense. Remember to "face" the rods in the same direction. Meaning all tighten or loosen when moved in the same directions, this will save time and frustration when tuning. Again, use a small amount of lube on the threads. Servo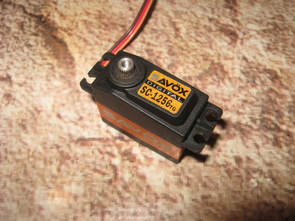 Purchase a metal geared servo, digital if you can afford it, and your other electronics are rated for one. Ask for assistance on purchasing a servo as there are different rating requirements for each class. If forced to use an inexpensive servo, look into a spring loaded servo saver. A servo saver is a "shock absorber" for the servo. Some kits have these integrated already into the steering, most racing grade kits do not. Servo savers may also not fit into all vehicles. Last, if you can fit one in, these are great investment during your learning phase. They can result in steering feeling slower, or mushy, but they can also keep you from breaking servo gears that are delicate and time consuming to repair. Once you are no longer wrecking often, the saver should be removed, or the steering servo saver nut position reevaluated. A fortune does not need to be spent on a quality servo, but this is one area where splurging is well worth the expense. SparesInvest in a full set of arms, carriers, hinge pins, and steering parts. I also recommend keeping a spare set of transmission gears, and a few differing pinion and spur gears for gearing changes. At a minimum these parts will allow you to survive a night of racing. It is not a matter of if you will break a part, but when. Even the best racers snap a part occasionally. Often fellow racers will toss a spare your way but it should never be expected. Race DayCall ahead to the track for race times, arrive early, ask for help from the owner in getting set up including motor and transponder (a device for recording laps and times) requirements. Transponders can often be loaned or rented at most race venues. Ask what to expect during and after a race, and what is expected of you. Pay attention to the race order, and turn marshal after your race. Keep your pit area clean, neat, and pick up after yourself when you leave.
After every kit build, I still consider the first race a "shakedown" to get the bugs out, and fix any defects either in set up or equipment. Expect the same. Avoid getting rushed, flustered, or angry (I know easier said than done) as these will slow you down. Do NOT expect to place or win your first few races. This is simply not realistic. Instead concentrate on not wrecking, driving clean lines, and making friends in the pits. The number one thing to improve you chance of winning, is track time. This should always be precedent. The new titanium graphite gizmo on the market is not going to save you if you turn "turtle" every lap, and the turn marshal is so tired from fetching your ride he starts to look the other way when it flips. Drive the line slow, until your not wrecking, then try to shave corners and time. As time passes you will get faster, and might even start passing others.
3 Comments
 Most people collect something, but how many of us actually properly take care of what we own? Preserving the past and what we have worked so hard to find is important. This second in a series of articles will give you a brief idea of how to store and care for your RC or any collectible in general. General Storage
PAPER INSTRUCTIONS & KIT BOXEs
METAL PRESERVATION All metals with the exception of gold are susceptible to oxidation or corrosion. Prevention of corrosion should be the most important aspect of caring for your RC as it is much easier, and less costly to prevent oxidation than it is to restore the metal. Most corrosion is caused by moisture. The obvious answer to preventing oxidation to your RC is to store them in a relatively dry environment. The naturally occurring oils on skin can be very damaging to metal. Do not handle metal parts with bare hands, gloves should be used when possible. Again, this is not always a practical consideration for an RC that is still in use, but once the kit is deemed to be in a “collector status” the kit should be refurbished, prepped for storage and handled with gloves whenever possible. STEEL: This is one of the most common metals and is commonly found in RC, axles, hardware, gears, and motor cans are often made of steel. Steel parts should be preserved by keeping them oiled with lightweight oil. When reassembling a kit, screws can be oiled, the excess wiped off, and reinstalled. Axles should be removed from the kit and the same steps followed as with oiling hardware. Do not forget to also oil treat out drives from the transmission. ALUMINUM & ZINC (AKA Pot Metal & White Metal): Most aluminum utilized in RC is anodized and thus protected from oxidation. Bare aluminum and zinc (often found on AYK, early Tamiya and Kyosho kits) will oxidize if exposed to excessive moisture. The oxidation of these metals will often result in a “fish scale” or powder like film. These metals should be protected with an oil coating or silicone based spray. A secondary option for bare aluminum or Zinc parts is to clear coat the part resulting in a permanent sealing of the component. RUBBER TIRES AND WIRING Mint condition vintage tires, bodies and chassis are the hardest parts to locate, and as time passes, kits with intact OEM tires will be highly sought after as rubber degrades rapidly. Museum curators often state that the preservation of rubber parts is the most time consuming and challenging aspect of their positions. This is a serious issue that effects more than RC. Rubber parts of WWII weapons systems, tires, belts, hoses, and even Neil Armstrong's NASA space suit are in serious jeopardy of disappearing due to the degradation of their rubber components. With care, the life of your rubber RC parts can be extended.
 Most people collect something, but how many of us actually properly take care of what we own? Preserving the past and what we have worked so hard to find is important. This series of articles will give you a brief idea of how to store and care for your RC, or any collectible in general. In addition to preserving your RC vehicles it is important to remember to preserve the history (also called provenance) of your car or truck. For example, if the car was raced by a sponsored driver, one should take the time to record the name of the driver and events the car was raced at. If the vehicle has been upgraded, modified, or has unique parts, such as prototype parts, these facts should also be recorded. Take the time to record as much information as possible about the vehicle. It is recommended that you make copies of your vehicle history and keep one copy with the kit and another, with a photo, in a separate safeguarded location. This information will be of the utmost value if you ever go to sell the kit, or the kit is lost or stolen due to disaster and insurance information is needed for replacement. EIGHT HAZARDS TO RC VEHICLES1. LIGHT: Excessive light can result in the fading of paint, the yellowing of decals and the deterioration of rubber components such as tires and wiring. Kits should be protected from excessive light, especially sunlight and florescent lighting, which contain high levels of ultraviolet (UV) radiation which is the most damaging form of light. Never display RC kits in direct sunlight and excessive florescent lighting should be avoided. 2. TEMPERATURE: Excessive temperature or rapid temperature changes should be avoided as they can damage rubber, plastic and metal. Store or display your RC collection in areas that are climate controlled (heated and air conditioned). Do not store RC vehicles in sheds, attics, basements, or garages as these areas often are not climate controlled. 3. HUMIDITY: High humidity can encourage pests, mold growth on paper, and the oxidation (rust) of metal parts. Excessively low humidity can cause tires to become brittle, so these should be prepped for storage in a differing manor than the rest of your kit. In general, store RC memorabilia in an area that has a constant humidity (45%-55%) and away from heating and air conditioning vents.  4. PESTS: Care should be taken to protect your collection from pests. Roaches and silverfish are attracted to paper and kit boxes. Rodents can be extremely damaging to bodies, plastic, rubber, and boxes if allowed to inhabit storage areas. Storage should be intended to isolate the RC kit away from these threats with regular inspections to ensure that pests have not obtained a foothold. The professional fumigation or the setting of traps in a collection storage area is a good idea as a preventative measure. Exercise common sense and care if children or pets may have access to a storage area that has been recently treated with pesticides or has live traps.
5. HUMAN THREATS: Human threats to your RC collection result from two sources, handling, and thievery. Handling is one of the most serious threats to your collection. Human skin often transfers natural oils or acidic sweat to an object. It is not uncommon to see steel parts, such as hardware or CVD axles, with oxidized areas (clearly fingerprints), several years after handling. Cotton or nylon gloves should be used as often as is possible. This is of course, not always a practical consideration for a kit that is still in use, however, once a car or truck has been “retired” into your collection it should be cleaned, prepped for storage and only handled with gloves after this time. If an RC must be handled some thought should also go into the work environment with planning for dropping the RC. Showing off your prized RC to a friend, only to drop it on a concrete floor, will be more damaging than dropping it on a rubber mat or carpet. Human threats also can present as unauthorized access and thievery. Buy a lock to prevent children and pets from gaining access to your collection. Dogs like to chew, cats often spray to mark territory, and an RC car is a “kid magnet”, all can result in damage to your kits. Common house hold measures such as keeping blinds closed and not advertising your collection to people you do not know well is another good safeguard to protect against theft. Last, the placement of an alarm system, even if an inexpensive magnetic door alarm, can alert the owner to unauthorized access or a door left ajar. 6. CHEMICAL REACTION & AIR POLLUTANTS: Air pollution, both from smoking and air pollution particularly ozone (O3), can be very damaging to rubber and plastics. For white nylon parts, such as early Team Associated RC10 kits, it is often easy to spot a kit that has been stored in a smoking environment from its yellowed appearance and cracked parts. Pollution can turn a mint condition, high monetary value kit into a less desirable kit, and care should be taken to protect kits from pollutants. Placing a kit in a plastic bag will shield the vehicle from acidic dust and pollutants. 7. DISASTER: As with any collection natural disaster can erase or heavily damage your collection quickly. Display or storage areas should have a working fire alarm and a charged and rated fire extinguisher. Selection of a storage area should be away from water mains and not susceptible to flooding. Last, insure your collection. Often your collection will be protected under homeowners insurance; however you should refer to your insurance representative for further advice. Additional financial protection for your collection (normally under the furs, antiques, firearms, and art insurance categories) can be purchased with little additional cost to your existing insurance. As stated above, your collection should be well documented, both in writing and photos with documentation stored by your insurance agent, or off site from the actual storage area. 8. BATTERIES: Batteries should be removed from all radio equipment and vehicles. Leaking or expanding cells can corrode or physically damage radios and RC vehicles. For the display of vintage kits with period correct electronics, NiCad/NiMh batteries if no longer serviceable and intended for display only, should be discharged fully by connecting to a 12 volt light bulb via an appropriate plug. A cooling fan is recommended during this process for both the bulb and the battery pack, and this technique should NEVER be used on a fully charged pack as it can damage the shrink wrap. Common sense should be exercised as the bulb will present a thermal hazard and should not be left unattended during the discharge process. This method is NOT recommended for any other type of battery type other than NiCad/NiMh. The battery should be discharged well past allowing the bulb to dim; even if the filament is not glowing it is drawing current. This should be repeated until the bulb no longer glows when plugged in. This will effectively “kill” the battery and it should not pose a future electrical hazard (some natural recharge is always a possibility). The battery may still pose an acid hazard due to leakage but I have not seen a battery leak yet when initially treated in this manner. I have stored these display batteries in my kits for a while and have not had any issues; however, it is still advisable that they should be stored separately from the kit to prevent possible damage. Common fishing tackle boxes with plastic side walls and a common plastic bag are an excellent means of organized storage for vintage RC batteries. If batteries are not going to be kept for display purposes they should be properly disposed of by a licensed recycler. Most electrics shops, Best Buy, Radio Shack, etc., will take your old batteries (including AA dry cell type) for disposal as a public service. RC can be expensive, and collecting vintage cars, even more so. Most of the points in this article are common sense, but taking care of your collection starts with knowing how to do it right.
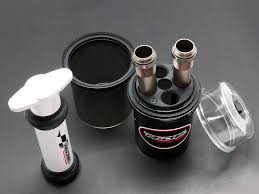
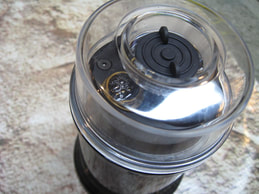
I have been RC racing since 1986, and one of the things that continues to interest me is the always changing technology of the hobby. Brushless motors are a far cry from the Mabuchi 540, and battery tech is phenomenal compared to years ago. It is rare however, that a simple product blows me away. The Ride Racing Team oil shock vacuum chamber is one of those items.
Getting all of the air out of oil shocks is the key to a consistent ride, and until now, I thought I was doing it right. On a whim I assembled my shocks per normal, and got all the air out. I then placed two shocks into the chamber and used the hand held sucker to create a vacuum. Immediately the oil started to boil and froth. This is the air that was still trapped in my less than perfect build shocks. A few tips, I wait until the bubbles stop, remove the shock, cycle the piston, and repeated until no air bubbles form. This might take 4 or 5 runs, but it is well worth it. Now I see why the pros do this, shock action is silky smooth, and repeatable for each corner. The Ride Air Removal Chamber comes in two sizes for on road (short 29100) and off road (long 29101). I found that the long works equally well for the short, and only purchased the long variant. I highly recommend you pick one of these up ASAP. Ride Racing Team: http://rc-ride.co.jp/en |
AuthorMichael Rogers Archives
July 2022
Categories |

 RSS Feed
|
|

|

|
The best way to search for the part you need is by the manufacturer's part number. If you do not know the part number, please visit our Archive Page, or use a common term like, "Losi XX shock tower."
All prices are in USD. Copyright © 2011-2024 Valkyrie RC Motorsports LLC. All rights reserved. All product names, logos, and brands are property of their respective owners. All wording and photos on this site are the property of Valkyrie RC Motorsports LLC, and may not be used without prior written consent..
BBB current rating is A+.
BBB current rating is A+.